
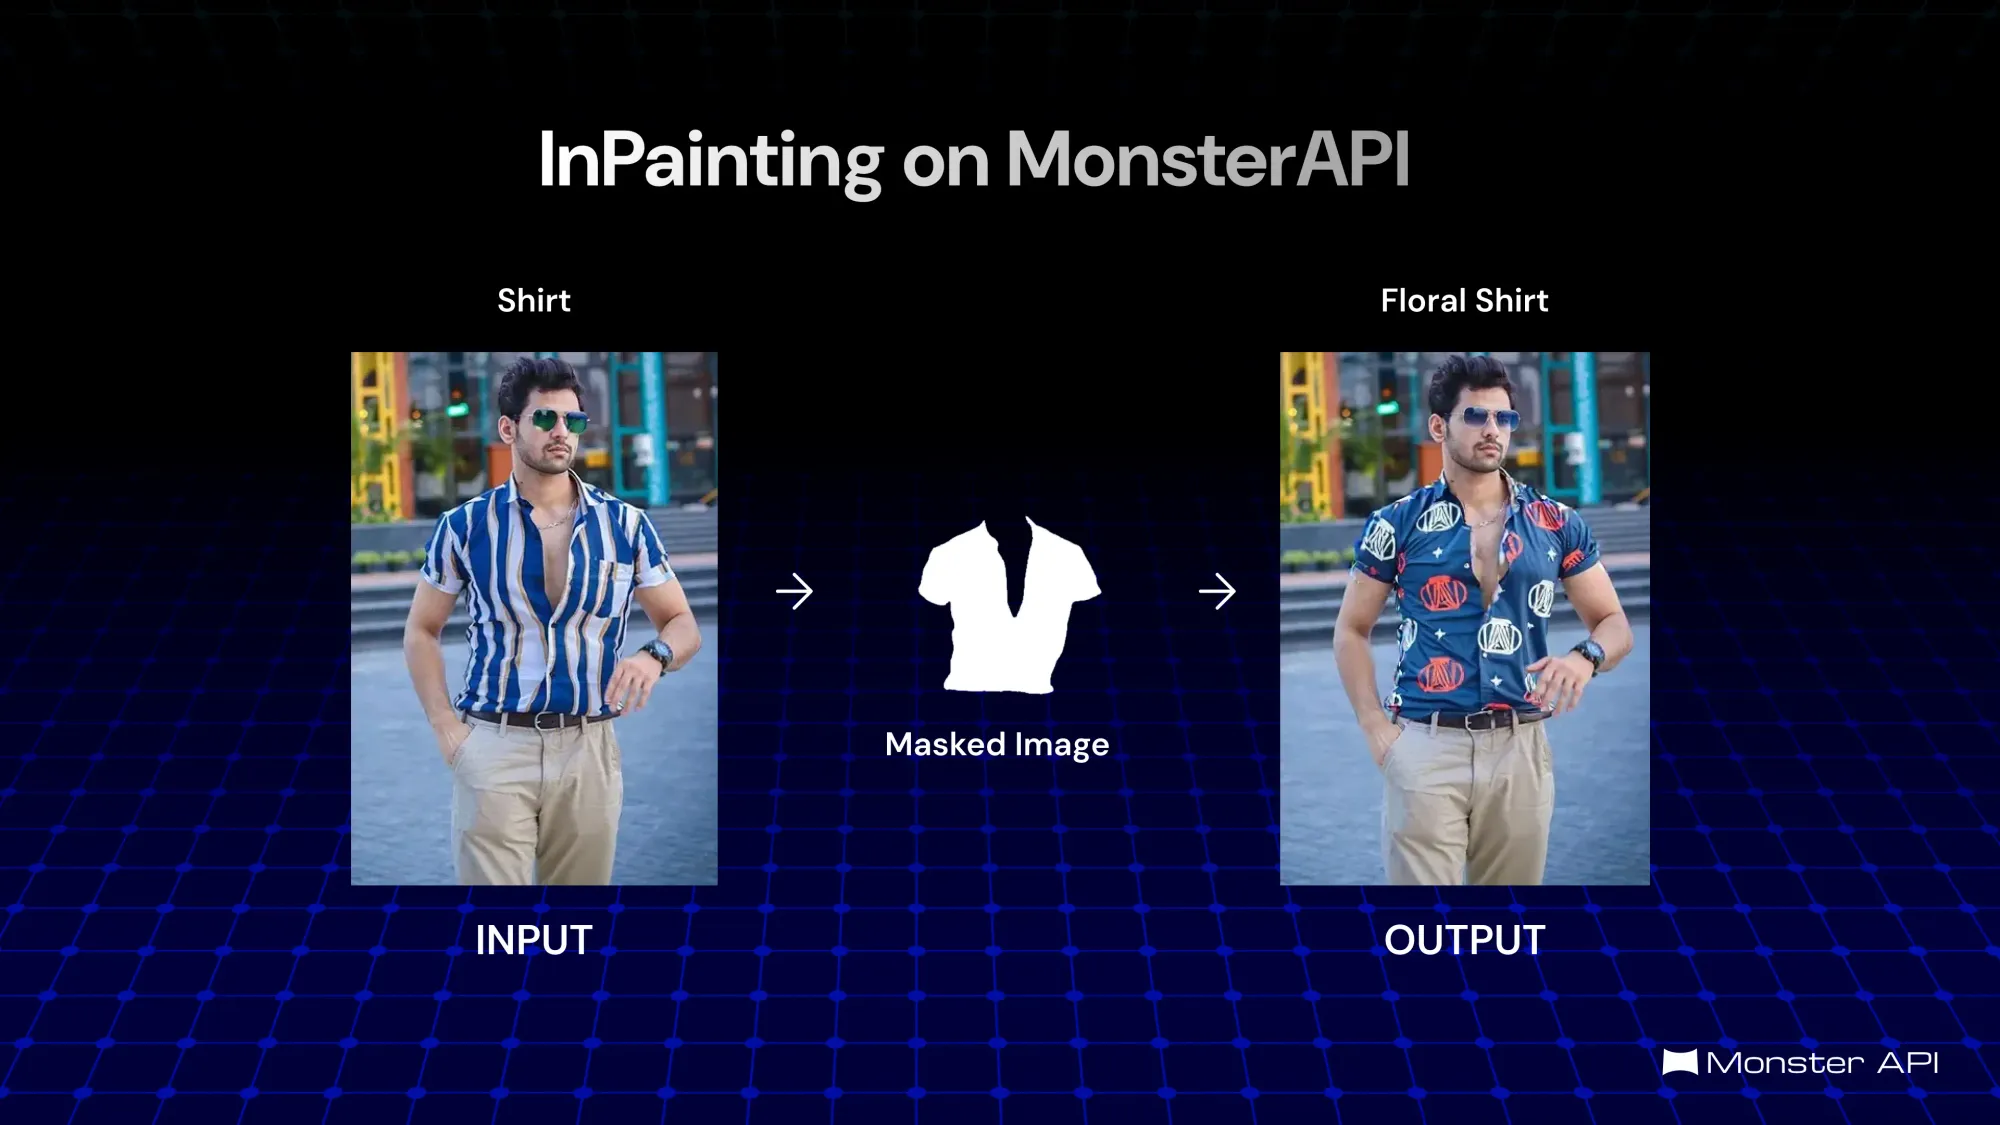
Text guided fashion clothes image inpainting on MonsterAPI
Using MonsterAPI's one click deployment, you can host a text-guided image inpainting service and edit your fashion images with simple text-based instructions.

Fashion never stands still, and keeping up with its rapid shifts demands more than just creativity—it calls for innovation. Whether you're a designer, marketer, or creative professional, the ability to update and adapt images to reflect the latest styles is essential.
Enter text-guided image inpainting, a revolutionary way to modify fashion photos with precision. By harnessing advanced segmentation and inpainting techniques, you can seamlessly alter clothing within images, bringing new designs to life or updating visuals for dynamic campaigns.
In this blog, we’ll explore how you can leverage MonsterAPI's one-click deployment solution to host a text-guided inpainting service within a few minutes and start editing your fashion images on the go!
What are Segmentation and Inpainting?
Segmentation breaks down an image into distinct parts, making it easy to identify and work on specific elements—like isolating clothing in fashion images. Inpainting, on the other hand, allows you to modify or replace these parts while keeping the overall image intact. Think of it as updating clothing styles, colors, or patterns seamlessly within an image.
How MonsterAPI enables text-guided Segmentation and Inpainting
MonsterAPI streamlines the entire text-guided segmentation and inpainting workflow with its one-click container deployment solution. Using the pre-built Docker image, monsterapi/apps:inpainting-segment, you can instantly set up an environment tailored for fashion image manipulation.
This image is fully equipped with advanced models for segmentation and inpainting, allowing you to effortlessly modify clothing styles based on text prompts. With MonsterAPI, the process becomes intuitive, scalable, and ready to handle even the most complex fashion editing tasks, enabling a seamless and efficient creative workflow.
Prerequisites
Before getting started, make sure you have the following:
- MonsterAPI Account: Create and activate your account on MonsterAPI.
- Docker Image: The Docker image we’ll use is monsterapi/apps:inpainting-segment.
- Service Port: The Flux-Inpaint Docker container will be configured to run on port 7860.
One-Click Deployment on MonsterAPI
Deploying Flux-Inpaint on MonsterAPI is simple and fast. With one-click deployment, you don’t need to worry about complex configurations, infrastructure, or managing hardware—MonsterAPI does it all for you.
Step-by-Step Guide to Deploying Flux-Inpaint on MonsterAPI
Step 1: Log in to MonsterAPI
Start by logging into your MonsterAPI account. Navigate to the dashboard, where you can manage your deployments.
Step 2: Create a New Deployment
- Navigate to the Deploy section by clicking here.
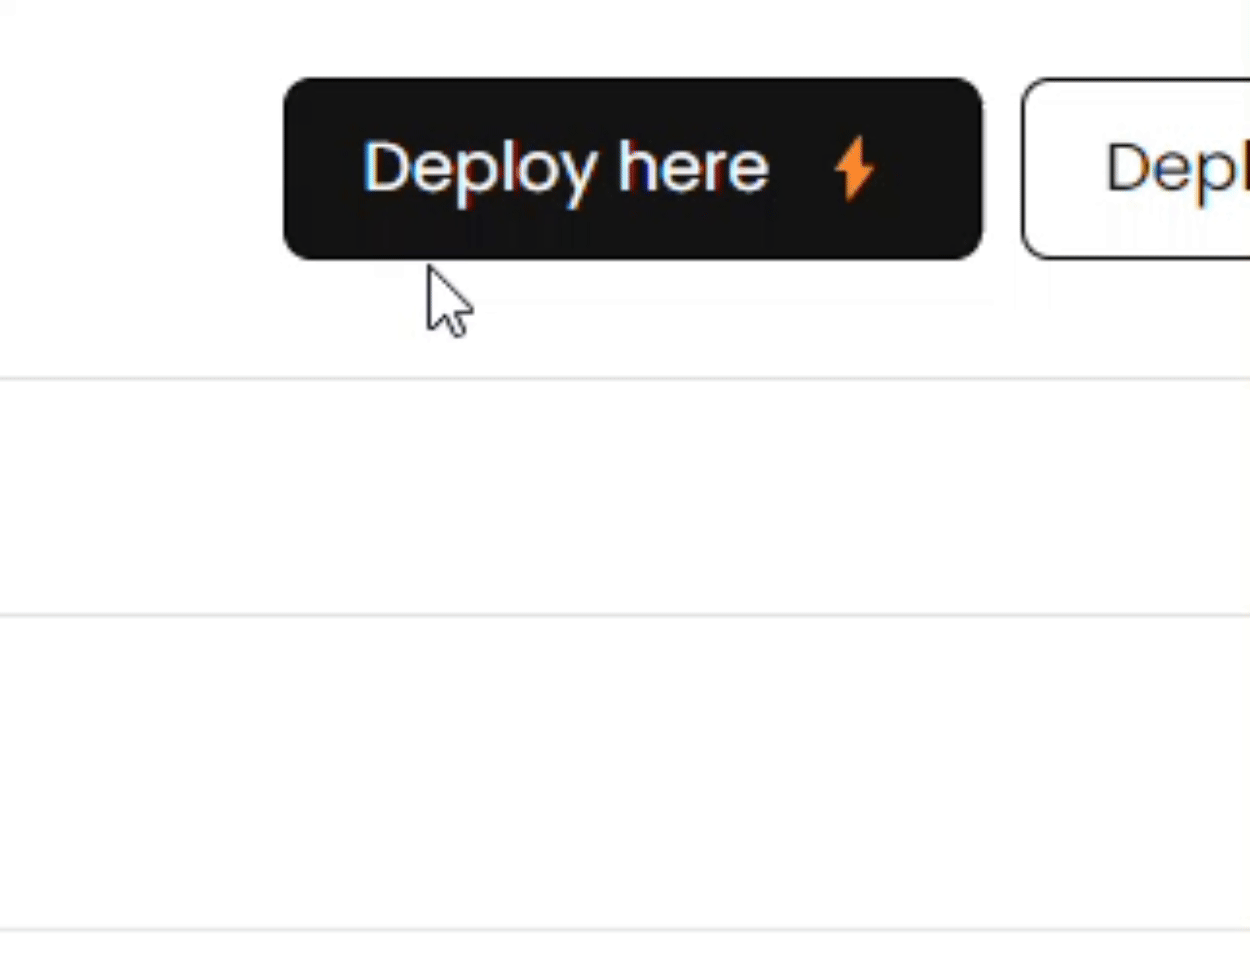
- Create New Deployment: Click on the "Deploy here" button and then choose “Deploy a Docker Image”.
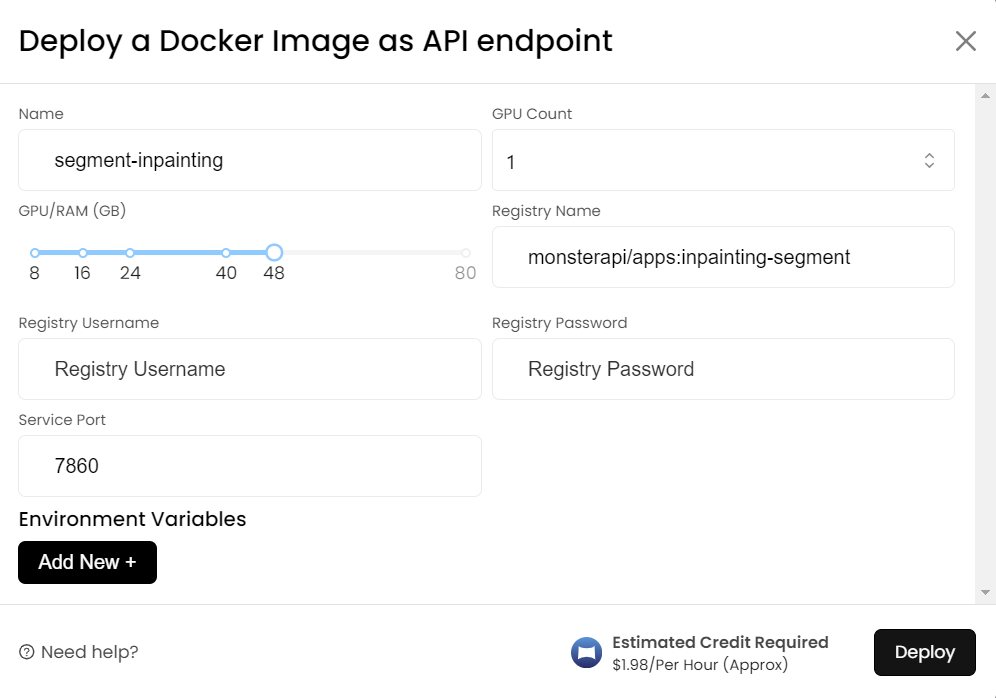
Step 3: Configure the Deployment
- Name Your Deployment: Provide a meaningful name for your deployment, such as "segment-inpainting".
- Select Docker Image: Under Registry Name, enter `monsterapi/apps:inpainting-segment`.
- Set the Service Port: Configure the service port to 7860 to ensure the Flux-Inpaint application runs on the specified port.
- Set GPU Ram: Make sure your GPU has at least 48GB of RAM. This amount of GPU memory is necessary to handle large image processing and prevent errors and breakdowns during the task.
- Advanced Settings (Optional): If there are any advanced settings specific to your use case, configure them accordingly. For most users, the default settings should suffice.
Step 4: Launch the Deployment
- Review Configuration: Double-check all the configurations to ensure everything is set correctly.
- Deploy: Click on the "Deploy" button to start the deployment process. MonsterAPI will now automatically orchestrate a GPU server launch and deploy a Docker container with the above-specified Flux-Inpaint Docker image and host it at the specified port for access.
Step 5: Access the Flux-Inpaint Web Interface
Once the deployment goes live (usually takes 15-20 minutes), you will be able to access the Flux-Inpaint interface by clicking on the “Open API Endpoint” button on your deployment’s dashboard. The URL will look like this: https://<your-deployment-id>.monsterapi.ai

Conclusion
The Segment-Inpaint Docker image on MonsterAPI offers a robust solution for changing fashion clothing in images using a combination of segmentation and inpainting techniques. By leveraging this tool, you can effortlessly adapt fashion images to new styles, create engaging visual content, and streamline your image processing workflows. With the pre-configured environment and user-friendly interface, you can focus on your creative vision without worrying about technical details.
Start transforming your fashion images today and take your visual content to the next level with MonsterAPI!
For further assistance, check out our documentation or contact support.