
Step-by-Step Guide to Finetuning SDXL

Today, we're super excited to announce the addition of fine-tuning support for SDXL 1.0, SD 2, and SD 2-1.
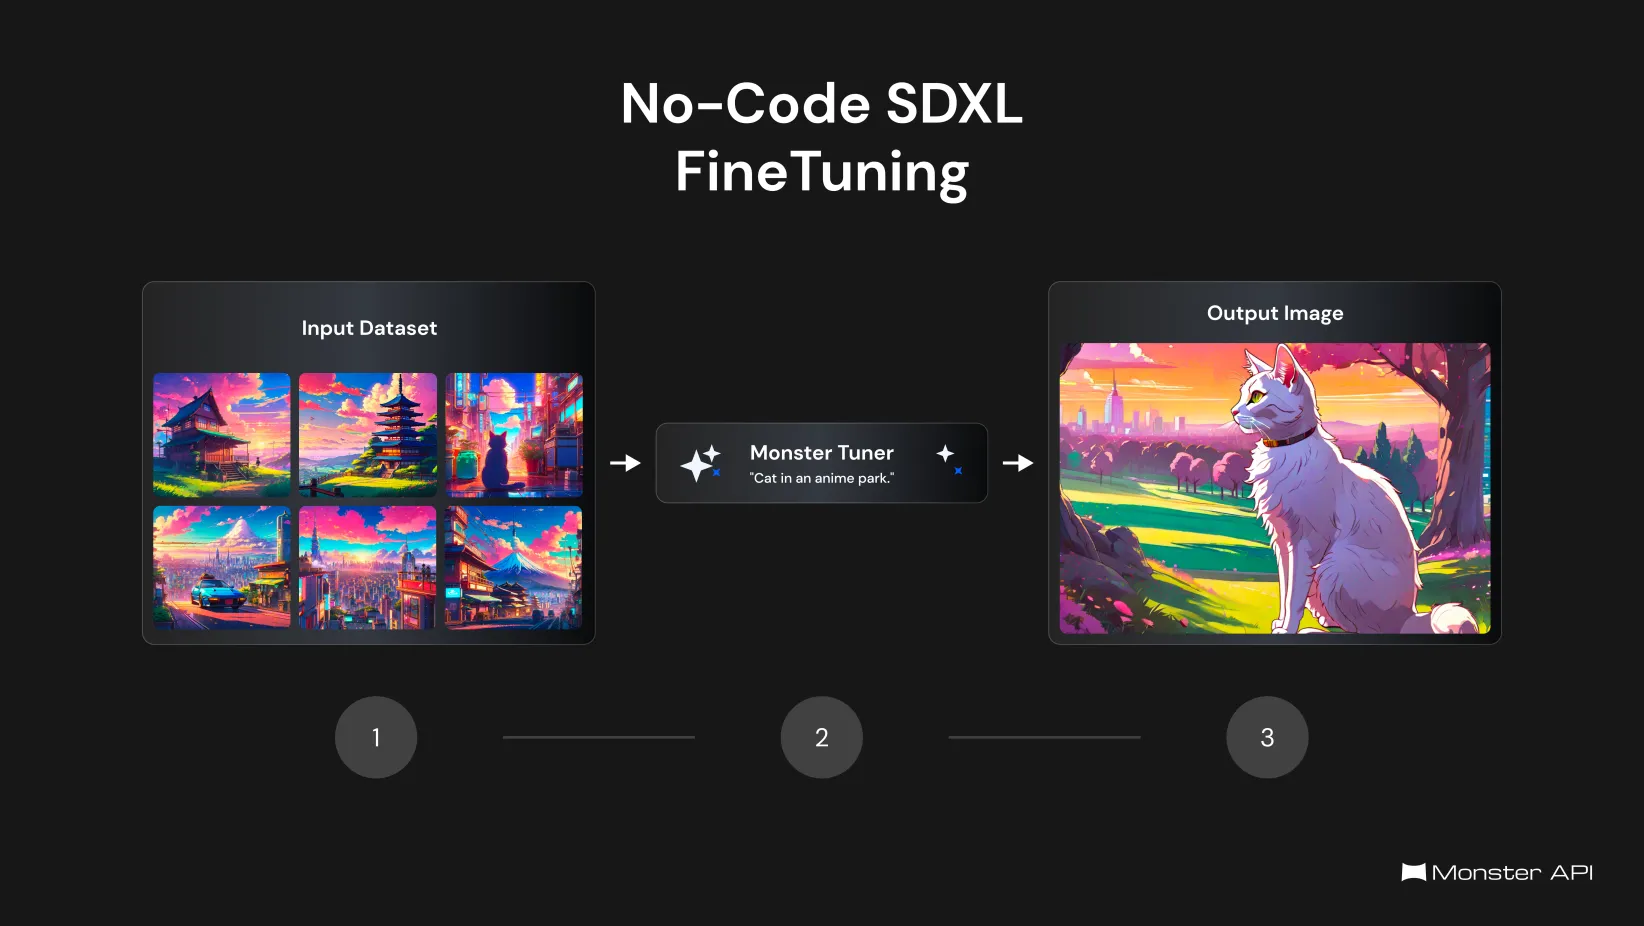
Fine-tuning helps you to train SDXL on specific objects or styles, enabling the creation of a new model capable of generating images tailored to those objects or styles.
In this post, we'll guide you through the process of fine-tuning SDXL using your images on MonsterAPI, without writing a single line of code. With just a few images, training your model takes only 15-20 minutes. Additionally, you can easily download your fine-tuned LoRA weights and deploy them in a single click.
What is SDXL fine-tuning with Dreambooth LoRA?
Fine-tuning is the process of enhancing a pre-trained model by training it with additional data, making it better suited for specific tasks. For example, it allows image models like SDXL to create more accurate pictures of certain people, objects, or styles.
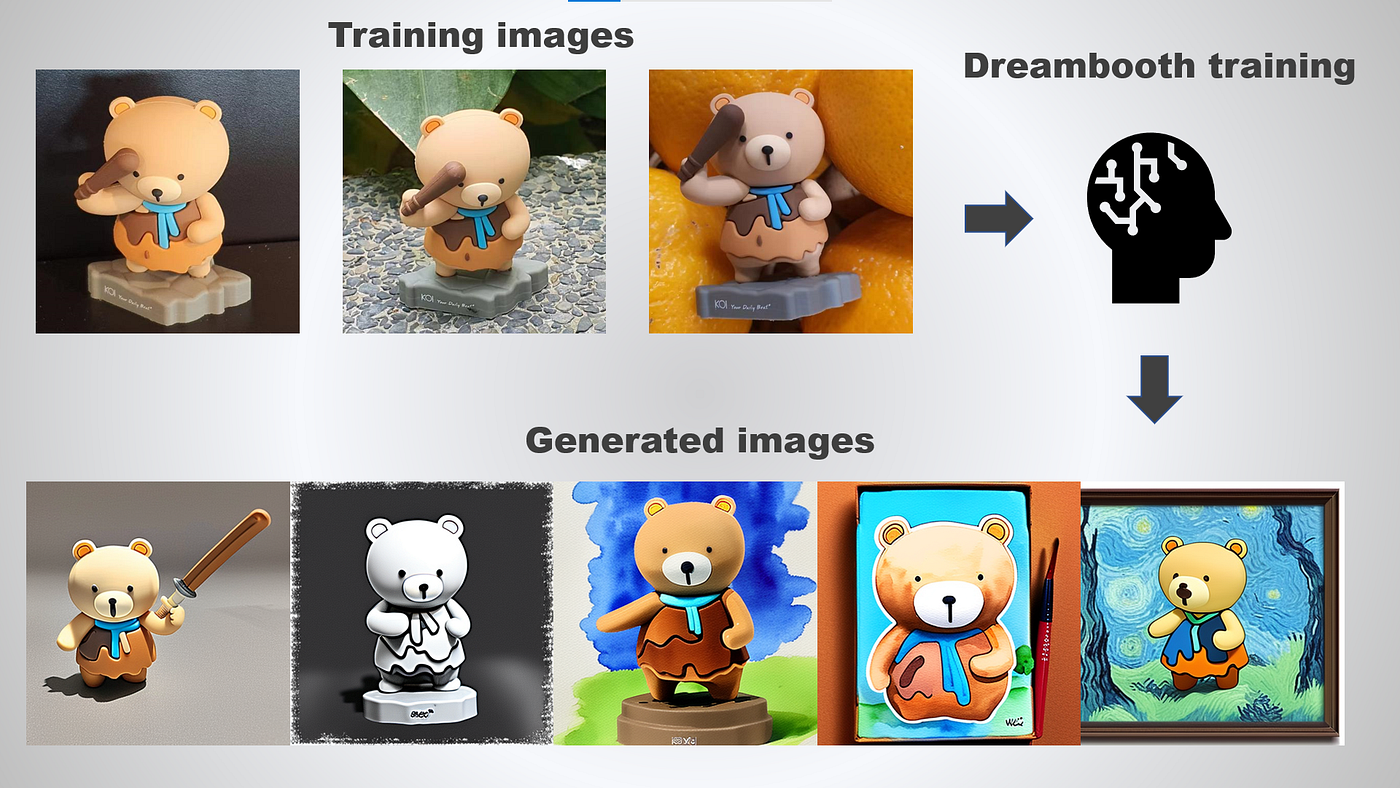
DreamBooth customizes the model with a few targeted images, enabling it to generate variations of a subject without losing its overall abilities. LoRA (Low-Rank Adaptation) enhances this by making small, precise changes to the model, making the process both effective and efficient. It needs less computational power and input data than usual methods.
Here's a step-by-step guide on how to fine-tune a Stable Diffusion Model:
To get started, visit the fine-tuning section in your MonsterAPI dashboard and select the "Finetune SDXL Model" option.
Follow the step-by-step process as mentioned below:
- Select a Stable Diffusion Model and define the Prompt
Choose a Stable Diffusion Model that fits your needs from the dropdown menu. Options include SDXL Base 1.0, Stable Diffusion 2, and Stable Diffusion 2-1.
Also, define your prompt on which the model will be trained. A training prompt for SDXL DreamBooth LoRA is a concise textual description that guides the fine-tuning process of the model on specific images or styles, focusing it to learn and replicate detailed characteristics from a small sample set for personalized image generation.

- Prepare Your Training Image Dataset:
The chosen model will learn from your provided image dataset. Go to the Datasets section to provide your dataset using one of the following options:
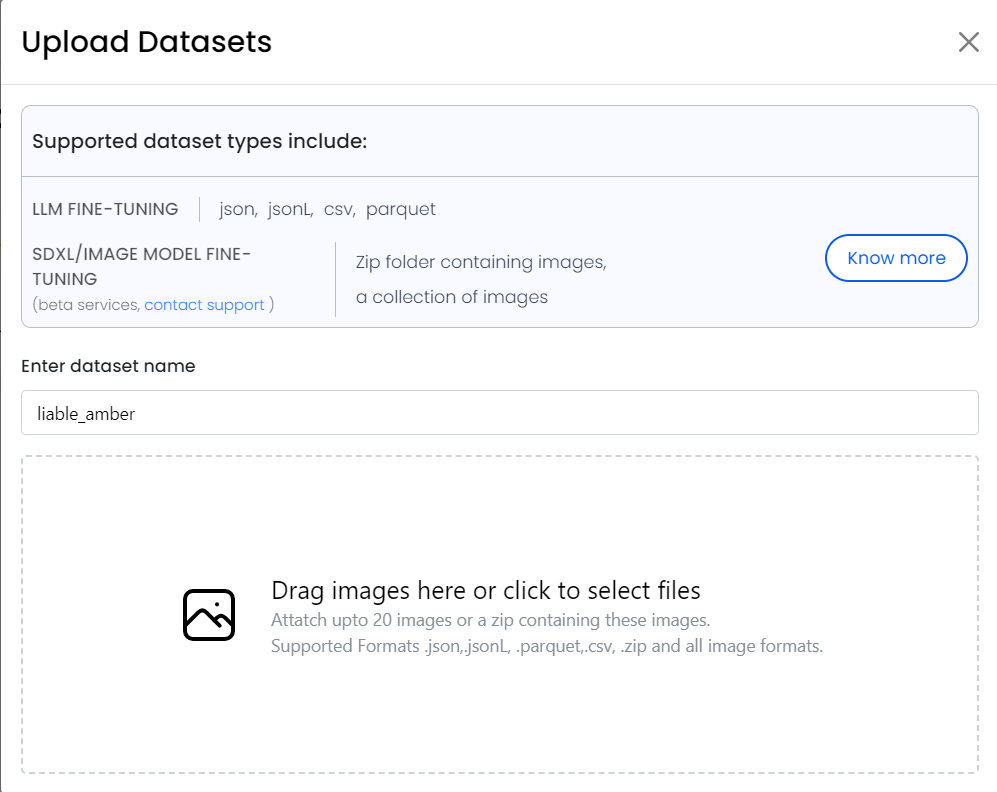
- Option 1: Upload a Custom Dataset (Easiest option):
- Upload a Zip file containing a collection of images or Simply drag & drop your images in the UI.
- Option 2: S3 Presigned Link:
- Share a secure pre-signed URL for dataset access.
- Option 3: Manual Bucket Access:
- If you have an AWS S3 bucket with image data in it, you can provide its AWS credentials to allow direct access to your dataset.
In this guide, we’ll simply drag and drop images and use them as a dataset
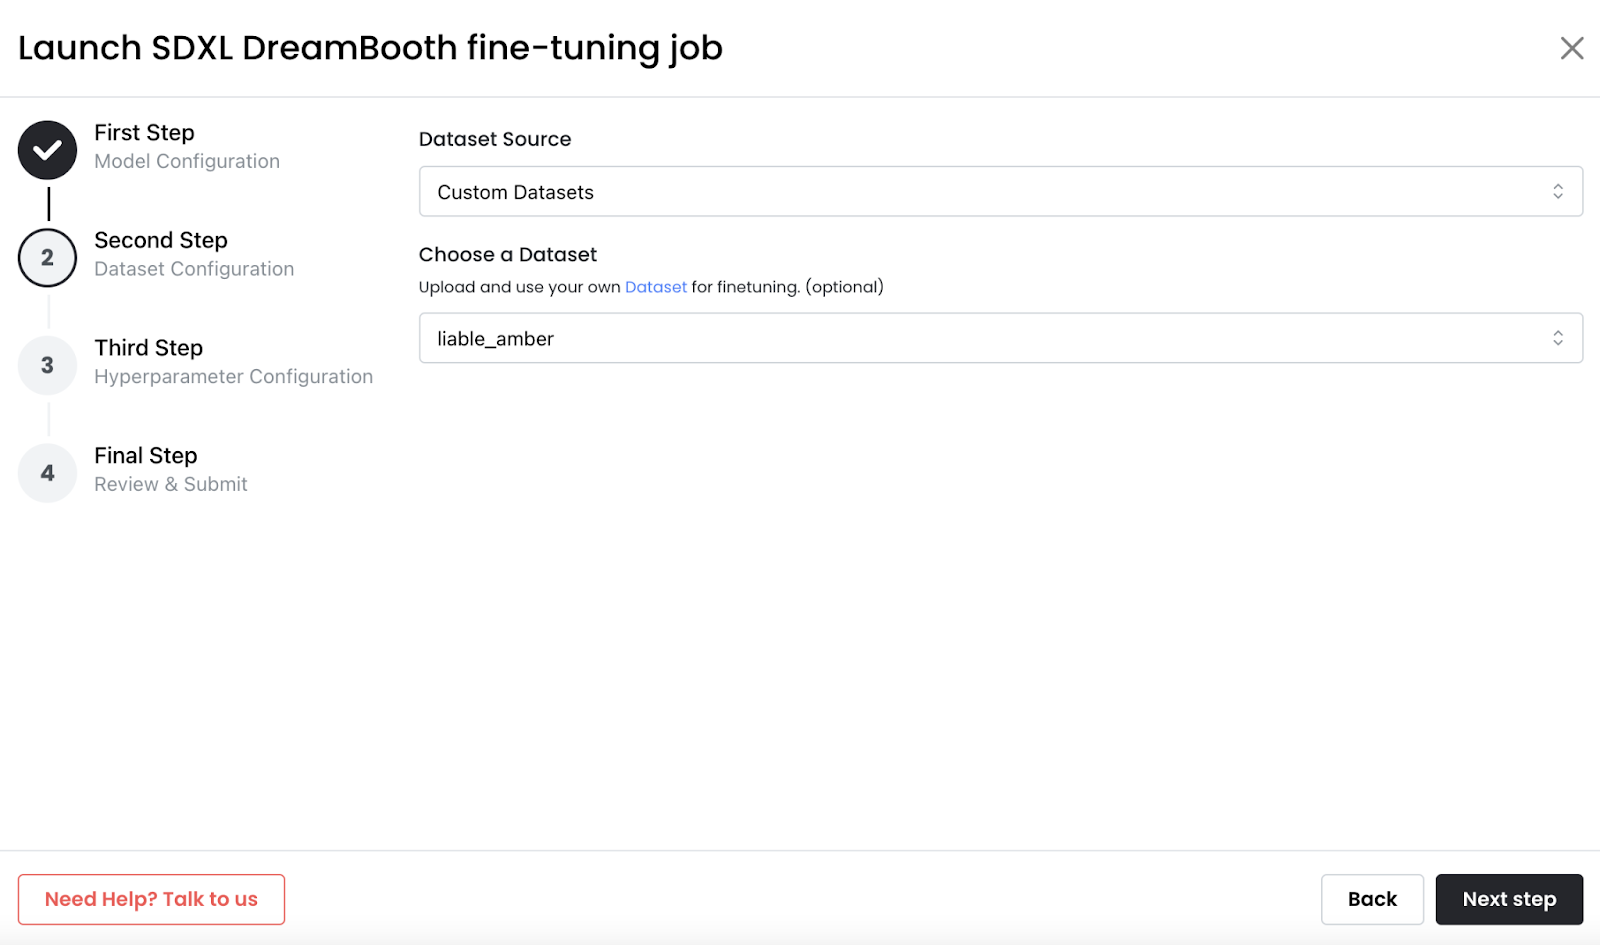
Once you have uploaded your dataset, come back to the finetuning job launch window and select your dataset:
- Specify Training Hyperparameters:
Set hyperparameters like learning rate, steps, resolution, etc. MonsterAPI provides a pre-filled template for all these that work for most of the generic cases but you may adjust them as per your use case needs.
Optionally, you may also provide HuggingFace (HF) credentials to upload the model to a HuggingFace model repo. Please note: For uploading the model to HuggingFace you would have to provide an HF Key with write access.

- Finally, Review and Submit the Job
Review the summary page to ensure all settings are correct, then submit your request. Your fine-tuning job will commence shortly, and you can monitor its progress in real time.
That's it! Once your job is in progress, you can view the job logs to track its status.
Deploy Fine-tuned SDXL Model
You can now Deploy Your Fine-tuned SDXL LoRA Adapter in Just one click!
With SDXL deployment, you'll have your model up and running, ready to be interacted with via a Gradio-based user interface.
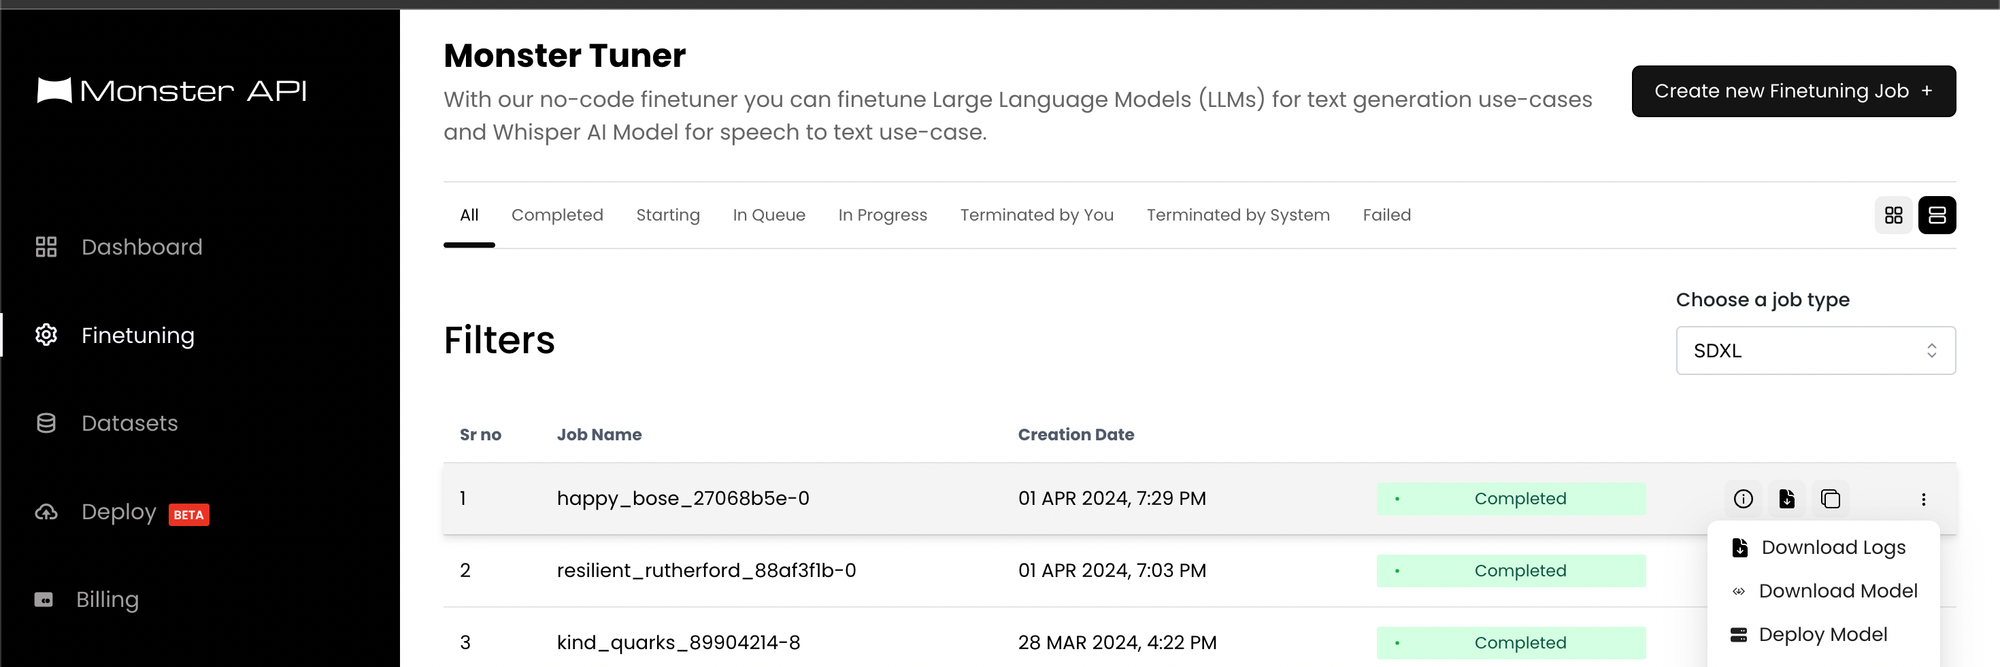
Simply click on "Deploy Model" once your fine-tuning job is completed
What Happens Next?
Immediately after your deployment is live, you will receive a link to a Gradio-based user interface. This interface allows you to interact with and showcase your fine-tuned SDXL LoRA adapter effortlessly.
Example Use Cases:
Example 1 - Add an Object (https://huggingface.co/monsterapi/sdxl_car_finetuning)
Training Prompt – There is a truck like the Ford F series. The background is a wide road cartoon, outline, simple, flat
Dataset –

Output Image –

Example 2 - Cultural Inclusion (https://huggingface.co/monsterapi/sdxl_chinatown_finetuning)
Training Prompt - neon punk with anime style cartoon
Dataset –

Output Image –

Summing Up - Finetune SDXL with No-Code
This guide shows you how to easily fine-tune the SDXL model with your images on MonsterAPI, without needing to code:
- Choose a Model: Select SDXL 1.0, SD 2, or SD 2-1 from the MonsterAPI dashboard.
- Prepare Images: Upload your images directly or via a S3 link.
- Set Hyperparameters: Adjust settings like learning rate and steps to fit your model.
- Submit & Monitor: Review settings, submit your fine-tuning job, and track progress in real-time.
- Deploy Model: Deploy your fine-tuned model with just a click and use it to generate images tailored to your needs through a Gradio interface.
This method simplifies creating models for specific styles or objects, making it accessible to anyone without technical expertise.
Replicate this Experiment yourself
Sign up for Beta Access now: Google Forms
- How to finetune a SDXL model - [Complete Gudie]
- How to Deploy a Finetuned SDXL Model - [Detailed Guide]
- How to launch an SDXL Finetuning Job - [Easy Guide]